Inhaltsverzeichnis
Participating in a Web Conference
We recommend using Google Chrome as default browser for using BBB.
You can participate in a conference by either visiting a direct link sent by an organiser or by following a redirection link from an online event in Moodle or Stud.IP.
Once you follow a direct or redirection link, you will be prompted to enter a room access code if one has been assigned. Once the code has been entered (if necessary), you can login using your RZ credentials or simply enter your name without logging in.
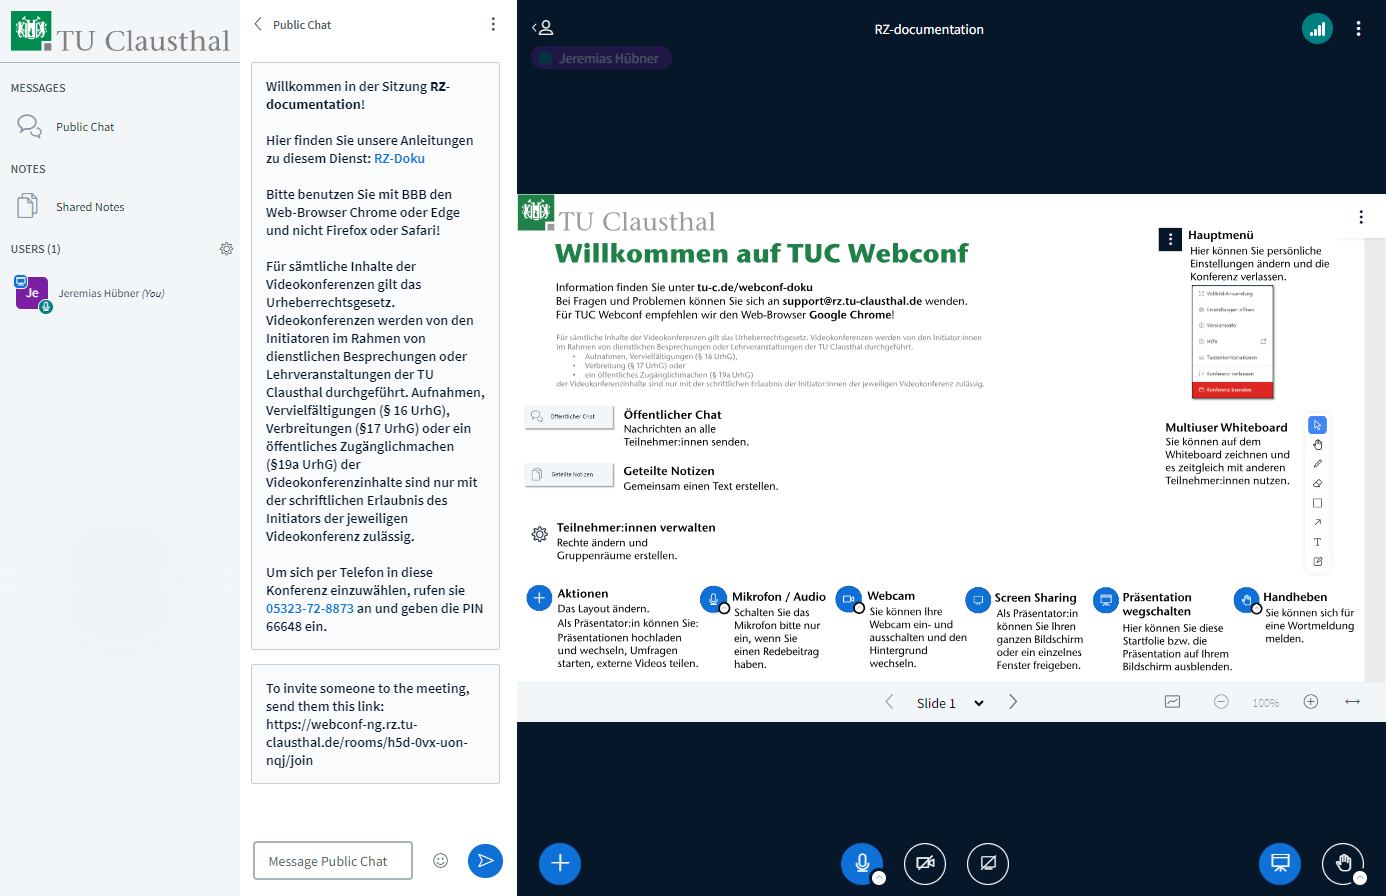
You will then be taken to the conference room where you can select the audio devices. Your web browser may display a dialogue box asking you to confirm access to your microphone.
The small white check mark next to the audio button allows you to select or change an audio device.
You can turn your microphone on and off by clicking on the microphone button on the left. To avoid accidental interruptions, it is recommended to turn your microphone off when not speaking.
You can share your camera by clicking on the camera icon:
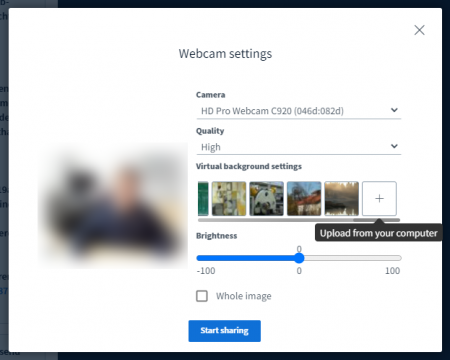
After giving permission to access your camera, you can choose the camera you would like to use, the transmission quality and an optional virtual background:
In addition to the preset backgrounds, you can also use your own background by selecting „Upload from device“. You can adjust the brightness of either your webcam image or the entire screen by using the slider in the „Brightness“ section.
You can open the camera settings by tapping the white tick next to the camera button and, for example, activate a second camera or change the background.
You can choose to show or hide slides and presentations by clicking the presentation icon on the bottom right. By default, the start-up slide is hidden. By clicking the hand icon next to the presentation icon, you can raise your hand to request to speak.
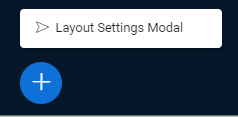
You can change the arrangement of webcams and presentation slides via the plus botton on the bottom left.
You can leave a conference by either clicking the red button in the top right corner or by closing your browser window. Other participants will remain in the conference room when you leave.
Public chat and shared notes
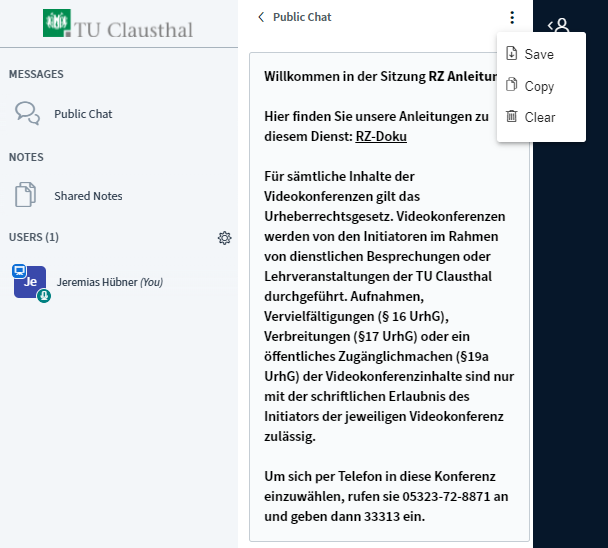
Chat messages are visible to all participants. They are not saved by default when a conference ends. However, you can manually save the content via the menu:
By selecting a participant from the user list, you can send a direct message which is only visible to the selected participant.
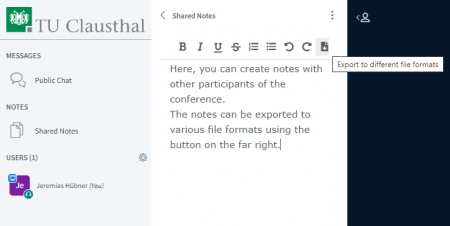
By clicking on shared notes, you can jointly write texts with other participants. These can be saved in standard format:
Configuring settings
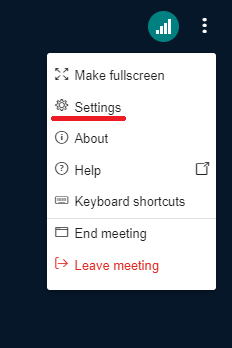
In the top right corner, you will find two buttons. The button on the left shows your connection status. The button on the right, which displays three dots, opens the main menu. You can access the settings menu via the main menu by selecting “Settings”.
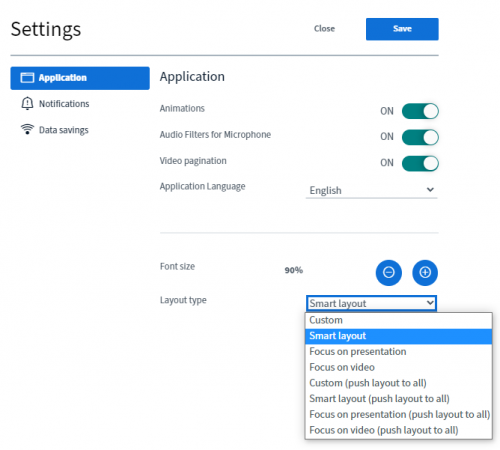
When selecting „Application“, you can switch off „Audio filters for microphone“. Note that this should only be done when using a conference system which supports echo cancellation.
You can use the drop-down menu next to “Layout type” to change the arrangement of webcams and presentation slides during the conference.
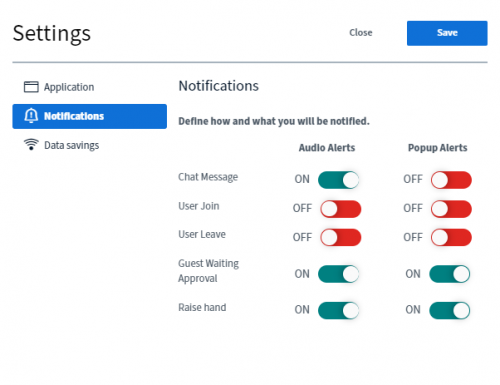
By selecting “Notifications”, you have the option to turn specific audio or visual notifications in a meeting on or off.
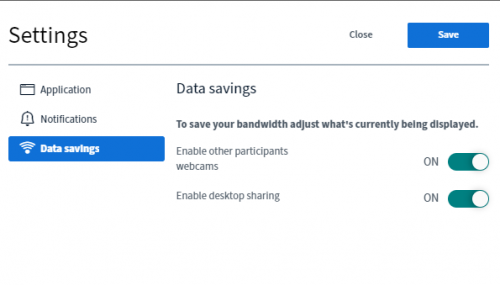
In the event you experience a weak network connection or other stability issues, you can save bandwidth by disabling webcams and/or screen sharing via “Data savings”.
Connection status
The left button in the top right corner displays your connection status. You can click the button for more information. For a stable connection, the button should be green. A frequent change to purple or red means your internet connection is likely weak or disrupted. By reducing the quality of your webcam or disabling webcams and/or screen sharing altogether, you may be able to temporarily improve your connection.
Improving picture and sound quality
To improve picture and sound quality, you can
- Switch off (mute) your microphone using the microphone button when not speaking.
- Avoid sources of interference and background noise, for example, by muting the telephone, closing windows and doors, etc.
- Use a headset. Headsets offer a significantly better speech intelligibility than built-in microphones which often pick up ambient and background noise.
- Ensure that your workplace is adequately lit. Avoid backlighting from windows or an illuminated white background.
- Position the camera either above or just to the side of the screen. This maintains line of sight and avoids perspectives which are distracting.
- Use a wired LAN connection, if possible. If only WLAN is available, ensure that you have a good signal strength and that there is little internet traffic and other data transmissions.
- Ensure your connection has enough bandwidth when joining from home. You can test the speed of your network connection at https://speedtest.rz.tu-clausthal.de/.
- Change the video quality from high (default) to medium, if necessary.

